DAZ Studio: 4.15.0.30
Category: Rigging
Level: Easy
Hi all…
Today I am going to show you a mini tutorial (most of a tip) about using the transfer utility in DAZ Studio, in order to rig a wearable that is not created in the original Genesis pose.
Let say I want to make some greaves for the Genesis 8 male, but I want the legs to be in the T-pose. I can import a Genesis 8 male into my scene and set the rotation into 6 and -6 for the right and the left thigh side-side parameter, correspondingly. Now my Genesis 8 male has a T-pose for the legs so I can export (*1) him into my modeling program to make the wearable (some greaves form my case).
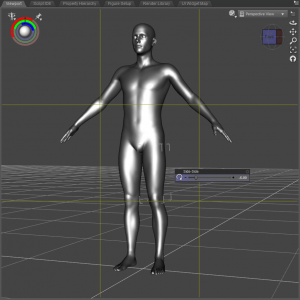
Finishing the modeling of the greaves, I have to import (*2) them back into DAZ Studio and run the transfer utility (*3) to rig them onto the Genesis figure. I still have the T-pose for my figure. I am running the transfer utility (*3) and I am choosing ‘Genesis 8 Male’ to be the source item into ‘Current’ shape, and my Greaves to be the Target item, into the default shape. As you can see this does not work for my item.
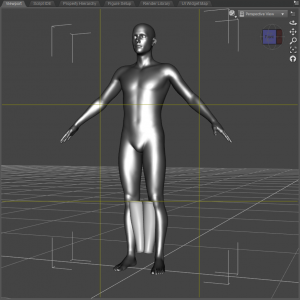
The secret is to ‘bake joint rotations’ into my Genesis figure into the T-pose, before I execute the transfer utility. So, in order to rig my greaves correctly I have to leave my figure into the pose I used for my modeling (T-pose with 6 and -6 rotations for Genesis thigh side-side rotations), choose the Joint Editor (*4) as my current tool …
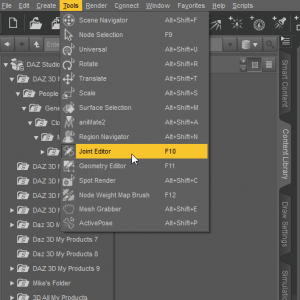
… and then choose the ‘bake joint rotation’(*5) …
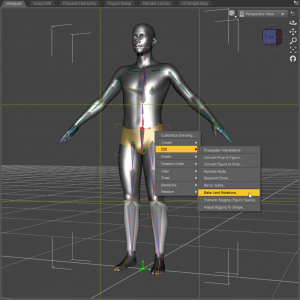
… having my figure selected. Then I can use the transfer utility (*3), setting …
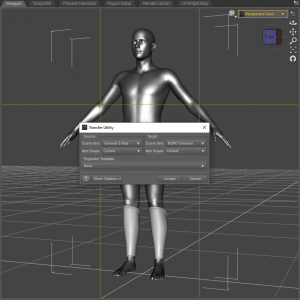
…‘Genesis 8 Male’ my source item, ‘current’ as the source shape, and ‘greaves’ as my target shape. Accepting the dialog will transfer now the correct weights into my wearable.
In conclusion the steps are:
- Pose your figure the way you want.
- Export (*1) the figure into your modeling software.
- Design the new wearable into your modeling software.
- Having your figure at the same pose as it was in step 1, import (*2) your wearable back into DAZ Studio.
- Set the ‘Joint Editor’ (*4) as the current tool.
- Select your Genesis figure and choose the ‘bake joint rotation’ option (*5).
- Run the ‘Transfer Utility’ (*3).
- Set your ‘Genesis figure’ as the source item and ‘current’ as the source shape, into the ‘Transfer Utility’ dialog. Set your new wearable as the target item. Accept the dialog.
Your new item is ready. Now you can choose to continue your rigging and don’t forget to save your item as a ‘Figure/Prop Asset’! When you save your asset, you can delete your Genesis figure and re-load it into the scene. The wearable will fit the figure now!
Happy riggings!!!
DAZ Studio actions, using the menu:
- Export a mesh: Set only the mesh you want to export visible into your scene and choose the ‘File/Export’ option from the menu.
- Import a mesh: Choose the ‘File/Import’ option from the menu.
- Transfer Utility: Choose the ‘Edit/Figure/Transfer Utility’ or the ‘Edit/Object/Transfer Utility’ from the menu.
- Joint Editor Tool: Select ‘Tools/Joint Editor’ from the menu.
- Bake Joint Rotations: Having the ‘Joint Editor Tool’(*4) as the selected tool, right click on the figure in the scene and choose ‘Edit/Bake Joint Rotations’ from the pop up menu.



 in my store page

